Cost‑Effective Runtime Security for Startups: What to Prioritize

Runtime security is essential for startups operating in fast-paced, cloud-native environments. It protects live applications from threats like zero-day exploits and privilege escalation, which traditional tools often miss. Startups face unique challenges – small teams, limited budgets, and rapid scaling – making lightweight, real-time monitoring tools indispensable.
Key takeaways:
- Why runtime security matters: Threats can emerge in seconds, and skipping runtime monitoring increases breach risks and compliance failures.
- Top tools for startups: Open-source options like Falco (real-time detection) and Sysdig OSS (forensic analysis) provide robust security without high costs.
- How to implement: Deploy tools with minimal resource usage, focus on least-privilege access, and integrate security into your CI/CD pipeline.
- Immediate actions: Enable MFA, automate backups, and monitor live processes for suspicious activity.
With the right tools and processes, startups can protect their systems effectively while staying within budget.
Choosing Lightweight Monitoring Tools That Fit Your Budget
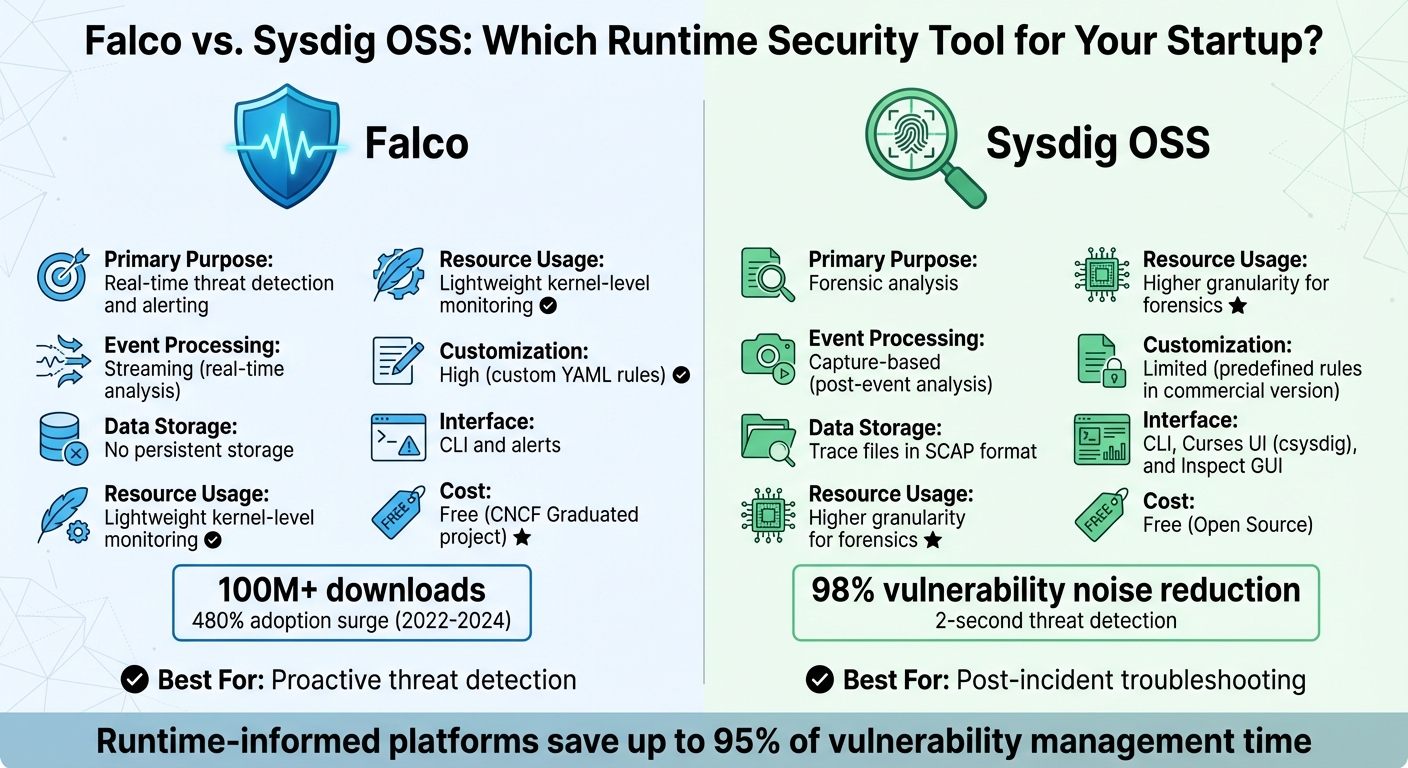
Falco vs Sysdig OSS: Runtime Security Tool Comparison for Startups
If you’re part of a small team working with limited resources, finding security tools that are both effective and budget-friendly is a must. Open-source options like Falco and Sysdig OSS stand out because they provide advanced security monitoring without the steep costs that come with enterprise-grade solutions. These tools use kernel-level instrumentation to detect threats in real time, but each serves a distinct role in your security strategy.
Falco, for instance, has been downloaded over 100 million times, with its adoption surging by 480% between 2022 and 2024. Meanwhile, Sysdig offers runtime insights that reduce vulnerability noise by 98%, focusing only on packages actively used during execution. Its threat detection can occur in as little as two seconds. For startups, where every dollar and second matter, these tools offer an efficient way to prioritize security.
Using Falco and Sysdig for Startup Security
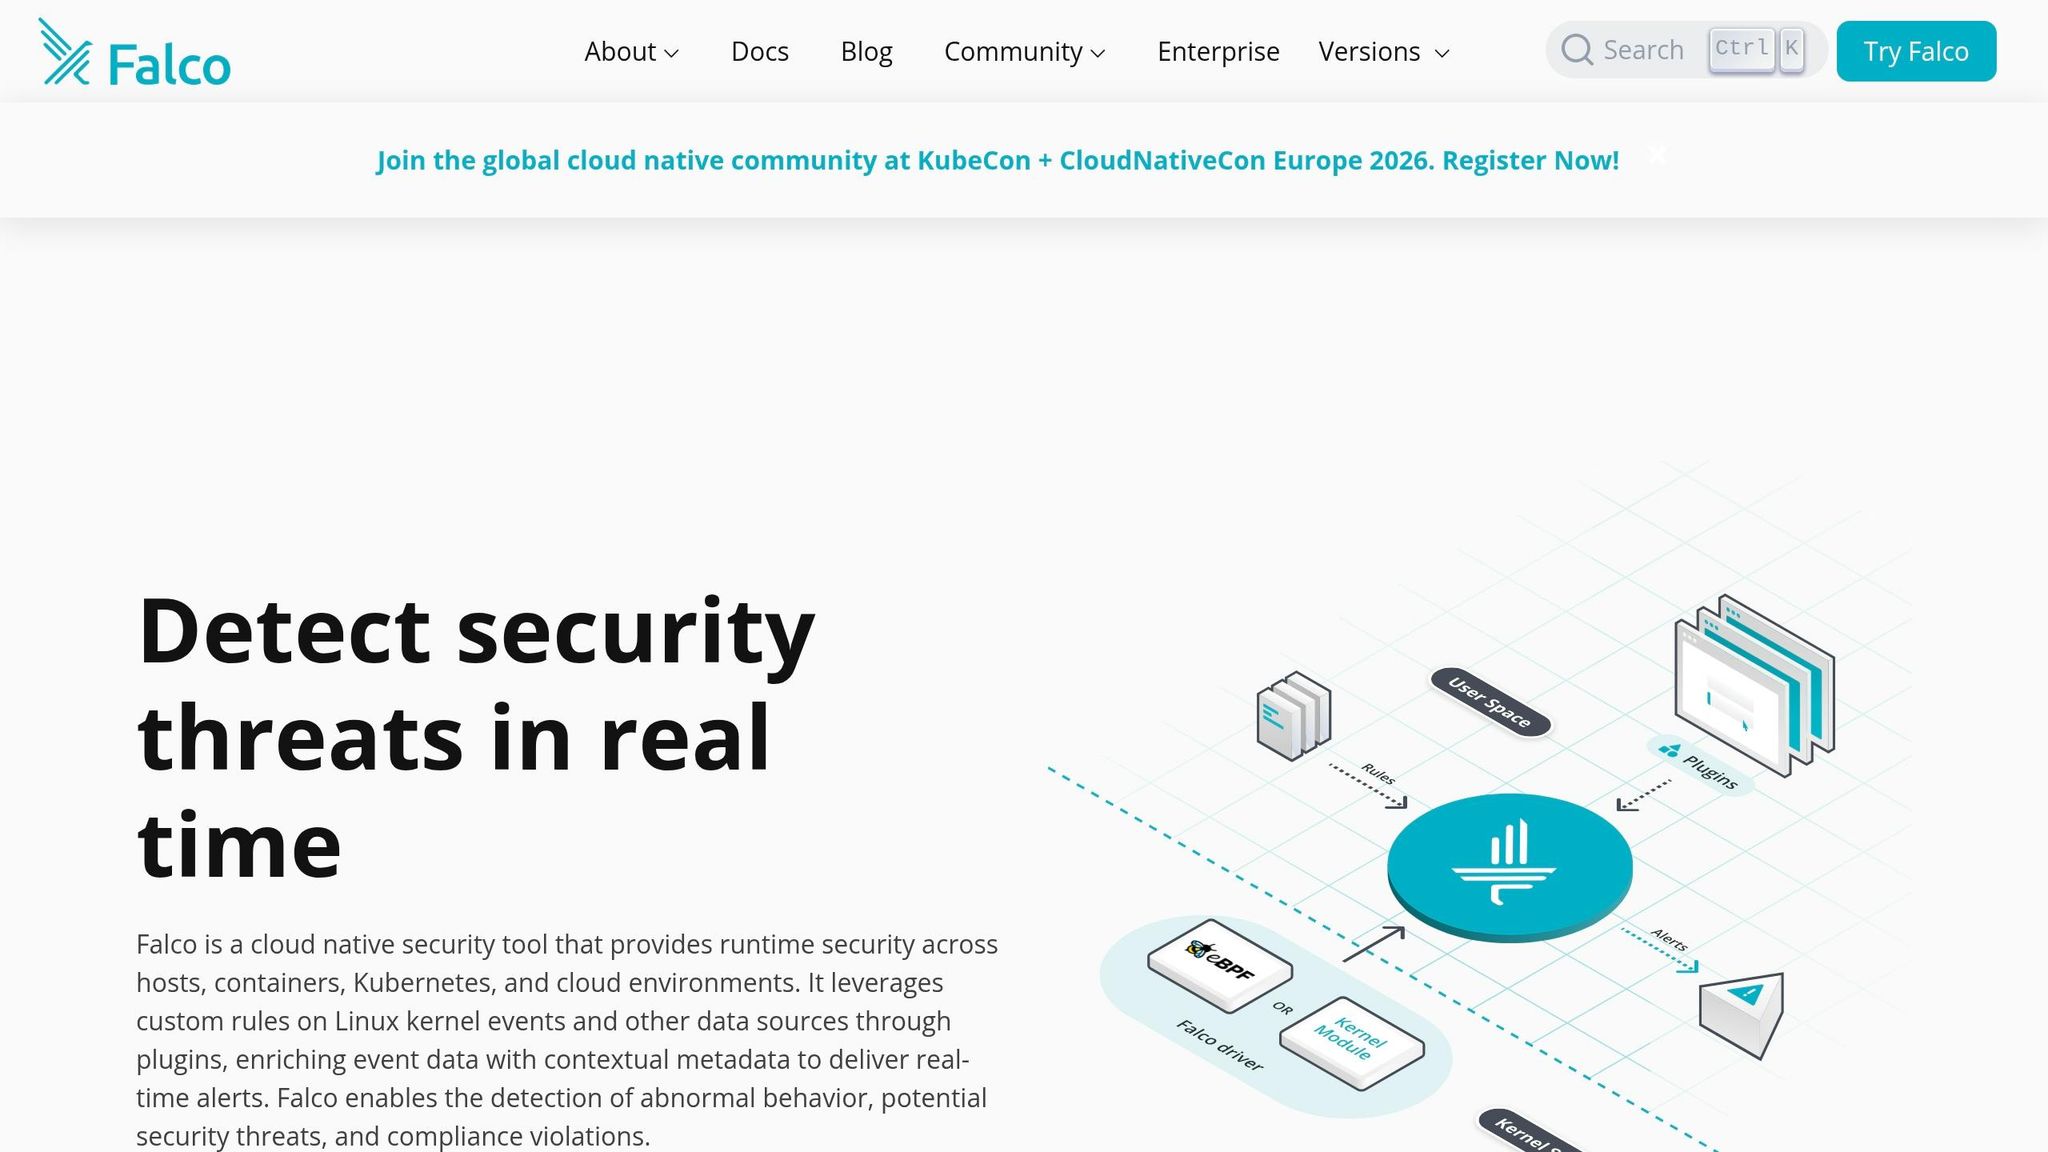
Falco works by monitoring system calls through eBPF, flagging unauthorized actions in real time based on predefined rules. Unlike traditional log-based tools that analyze events after the fact, Falco identifies threats like unauthorized shell access or privilege escalations as they happen.
"You can think of Falco like a network of security cameras for your infrastructure."
- Falco.org
For smaller teams, this means you get instant alerts without the need for a dedicated security operations center. With Falcosidekick, you can route alerts to more than 50 destinations, including Slack, email, or PagerDuty, enabling automated responses. It also comes with over 80 default rules designed for Kubernetes and Linux environments, saving you from spending weeks on custom configurations.
Sysdig OSS, on the other hand, focuses on capturing system activity into trace files for detailed forensic analysis. Think of it as your go-to tool when something goes wrong and you need to replay events to figure out what happened. The commercial version, Sysdig Secure, enhances this with managed security intelligence, offering expert-written rules through "Falco Feeds" for teams that prefer not to maintain their own detection logic.
"Runtime insights reveal real activity and exposure, cutting through noise to highlight what’s truly risky."
- Sysdig
Next, let’s explore how to deploy these tools on Kubernetes for seamless integration with your cloud environment.
Installing These Tools in Kubernetes
Installing Falco on Kubernetes is straightforward with Helm, the standard package manager for Kubernetes applications. The recommended setup involves deploying Falco as a DaemonSet, ensuring a monitoring agent runs on every node in your cluster. For systems running kernel versions 5.8 and above, you can use the modern eBPF driver with this command:
helm install falco falcosecurity/falco --set driver.kind=modern_ebpf.
This driver avoids kernel module compilation, reducing system overhead compared to older methods.
When working with limited infrastructure, resource allocation is critical. Set CPU requests between 100m and 200m, and memory at 512Mi, with limits at 1000m CPU and 1Gi memory. This ensures Falco doesn’t interfere with your application workloads while maintaining stable performance.
To minimize false positives – often a challenge for small teams – you can add rule exceptions. For instance, append and not container.name = "backup-pod" to your rules to avoid unnecessary alerts. Enabling Kubernetes metadata collection (collectors.kubernetes.enabled=true during installation) enriches alerts with pod names, namespaces, and container IDs, speeding up your response time.
You can verify your setup by running kubectl exec into a pod and attempting to read /etc/shadow. If configured correctly, Falco will immediately log a "Sensitive file read" alert. However, note that Falco cannot run on GKE Autopilot since it requires privileged containers to install its driver.
With the basics of installation covered, the choice between Falco and Sysdig depends on your specific needs.
Falco vs. Sysdig: Side-by-Side Comparison
Here’s a quick look at how Falco and Sysdig OSS stack up against each other:
| Feature | Falco | Sysdig OSS |
|---|---|---|
| Primary Purpose | Real-time threat detection and alerting | Forensic analysis |
| Event Processing | Streaming (real-time analysis) | Capture-based (post-event analysis) |
| Data Storage | No persistent storage | Trace files in SCAP format |
| Resource Usage | Lightweight kernel-level monitoring | Higher granularity for forensics |
| Customization | High (custom YAML rules) | Limited (predefined rules in commercial version) |
| Interface | CLI and alerts | CLI, Curses UI (csysdig), and Inspect GUI |
| Cost | Free (CNCF Graduated project) | Free (Open Source) |
For most startups, Falco is ideal for proactive, real-time threat detection, while Sysdig OSS shines as a post-incident troubleshooting tool. Teams using runtime-informed security platforms report saving up to 95% of their time on vulnerability management. These tools allow you to stretch your resources while maintaining a strong security foundation.
sbb-itb-f9e5962
Building Threat Detection Into Your Development Process
Catching security issues early saves time, money, and headaches. By addressing vulnerabilities during development, you avoid the chaos of patching live systems. This proactive approach, often called "shifting left," allows you to deal with security flaws when they’re cheaper and faster to fix.
Adding Security to Your Development Workflow
A great starting point is to use a free "Bootstrap AppSec Stack" that covers the majority of what paid tools offer. Tools like Gitleaks, Trivy, and Semgrep CE can scan for hardcoded secrets, container vulnerabilities, and code-level issues before they make it into your main branch.
Adopting a "Fail Fast Philosophy" is crucial: block builds for critical vulnerabilities, issue warnings for high-severity problems, and ignore minor ones. This keeps your team moving forward while ensuring major risks are caught early. For infrastructure-as-code, tools like Checkov can scan Terraform or CloudFormation templates to detect misconfigurations like public S3 buckets or overly permissive IAM roles before deployment.
"Developers hate security tools that block PRs for minor issues. My rule is simple: Block on Critical, Warn on High, Ignore the rest."
- Nikita Mosievskiy, Security Engineer
Even your deployment environment benefits from thoughtful security choices. For example, a standard node:20 Debian image typically includes over 400 packages with 15–30 known CVEs, while a distroless version reduces this to just around 15 packages with 0–2 CVEs. Automated CI/CD scans can catch vulnerabilities like the 11-day unpatched issue found in the node:20-alpine base image, helping you stay ahead of threats.
While these steps reduce risk before deployment, runtime defenses add an extra layer of protection for live applications.
Runtime Application Self-Protection (RASP) Explained
Pre-deployment scanning is critical, but it’s not the whole picture. RASP takes things further by actively monitoring your application during runtime. Acting like a real-time security guard, it blocks threats such as SQL injection, command injection, or unauthorized file access without needing human intervention.
For startups with small security teams, tools like Falco offer powerful threat detection during development and production. By creating custom rules, Falco can identify suspicious behaviors like web shells, reverse shells, or unauthorized processes. For example, if a package manager runs unexpectedly in production, it could signal a compromise. When a threat is detected, Falcosidekick can automate responses – like killing a compromised Kubernetes pod or sending an alert to Slack – helping to reduce your Mean Time to Containment (MTTC).
RASP bridges the gap between pre-deployment security and production safety, making it an essential tool for comprehensive protection. While open-source options are ideal for startups, larger teams or those managing over 50 repositories may eventually transition to commercial RASP tools for added scalability.
Setting Up Least-Privilege Access and Zero Trust Security
Real-time threat detection is a great start for securing active workloads, but pairing it with strong access control is what really helps minimize risks.
Excessive permissions are like handing out master keys to your entire system. If one gets stolen, the consequences can be massive. That’s where least-privilege access and zero trust security come in. Least-privilege access sets the boundaries, while zero trust enforces the principle of "never trust, always verify."
The numbers paint a clear picture: only 2.6% of workload identity permissions are actually used, and 51% of workload identities are completely inactive. Even more alarming, three out of every four attacks rely on valid credentials, meaning attackers often "log in" rather than "break in". For startups with smaller security teams, tightening access controls is one of the smartest ways to shrink your attack surface.
How to Implement Least-Privilege Access
Start by auditing application API calls through logs to figure out what permissions are truly needed. For example, in Kubernetes, use audit logs to track which API calls a service account makes during normal operations. This helps you identify the exact resources an application interacts with.
Once you’ve mapped out usage patterns, apply limited, namespace-specific access instead of granting broad permissions like cluster-admin or ClusterRoles. Use the resourceNames parameter in Kubernetes RBAC to narrow access to specific secrets or config maps. For instance, a payment service should only access payment-api-secret, not every secret in the namespace.
"Least privilege RBAC design limits permissions to the minimum required for applications to function. This security principle reduces the blast radius of compromised credentials."
- Nawaz Dhandala, OneUptime
For AWS, start with broader permissions and then narrow them down using usage data. Tools like IAM Access Analyzer can help generate restricted policies based on actual activity. For example, instead of granting access to all S3 buckets, limit it to just the five buckets your application uses. To double-check, use commands like kubectl auth can-i --as=system:serviceaccount:[namespace]:[sa-name] to confirm service accounts can’t perform unauthorized actions, such as deleting secrets.
To keep things flexible for developers without over-permissioning, use time-limited tokens and temporary RoleBindings for tasks like debugging. This way, privileged ports like SSH and RDP stay closed by default and only open temporarily after multi-factor authentication (MFA) verification.
This careful approach ensures permissions are tightly controlled while still allowing for operational flexibility.
Applying Zero Trust Principles in Cloud Environments
Zero trust shifts the focus from network perimeters to identity as the core security boundary. A key strategy here is network micro-segmentation, which isolates resources and requires explicit authorization for communication.
Start by setting a "deny-all" policy for both ingress and egress traffic at the namespace level. Then, explicitly allow only the traffic necessary for specific pods to communicate. In a default Kubernetes setup, any pod can talk to any other pod – a flat network structure that makes lateral movement easy if one container is compromised. Micro-segmentation, on the other hand, limits the damage to specific workloads.
"A single compromised container in a default Kubernetes cluster can escalate to full cluster compromise in minutes."
- Sarah Chen, Senior Cybersecurity Engineer, ZeonEdge
To keep your setup secure, use tools like Kube-bench to run automated compliance checks against the CIS Kubernetes Benchmark and identify misconfigurations. Enforce Pod Security Standards (PSS) by applying the "Restricted" profile at the namespace level to prevent risky behaviors like running containers as root or using host networking. Remember, Kubernetes Secrets are only base64-encoded, not encrypted, so anyone with get secrets permissions can read them. Use external secret managers like AWS Secrets Manager or HashiCorp Vault with the CSI Secrets Store Driver to avoid storing secrets in plaintext.
For authentication, ditch SMS-based MFA, which is vulnerable to SIM-swapping and phishing, and switch to hardware security keys or passkeys. As your operations grow across multiple clusters or clouds, adopt standards like SPIFFE/SPIRE or cloud-native IAM roles for service accounts, so you don’t have to manage static, long-lived secrets.
These steps strengthen your security framework while keeping it manageable for smaller teams.
Least-Privilege vs. Over-Permissioned Access: What Changes
Here’s how least-privilege access stacks up against over-permissioned access:
| Feature | Least-Privilege Access | Over-Permissioned Access |
|---|---|---|
| Blast Radius | Limited to specific assets | Broad, enabling attackers to exfiltrate or destroy critical data |
| Network Model | Micro-segmentation with "deny-all" policies | Flat network with implicit trust |
| Authentication | MFA with hardware keys and mTLS | Passwords or static API keys |
| Lateral Movement | Blocked; communication paths are restricted | Open; residual privileges allow attackers to spread |
| Compliance | Aligns with NIST, PCI DSS, HIPAA, and GDPR | Fails most audits and insurance checks |
| Operational Effort | Higher initial setup, ongoing monitoring | Minimal setup, but risky "set and forget" approach |
The goal isn’t to achieve perfection overnight. For example, granting access to five specific S3 buckets is far better than allowing s3:* permissions, even if it’s not perfectly restrictive. Focus on gradual improvement: start with broader service-level access, monitor usage, and refine policies based on real-world activity. This way, your security evolves alongside your operations.
Measuring Security Performance and Controlling Infrastructure Costs
Tracking the right metrics is essential to balance security effectiveness with cost management. Here’s a quick breakdown of key metrics to monitor:
| Metric | Why It Matters | How to Measure |
|---|---|---|
| Mean Time to Detect (MTTD) | Reduces the impact of breaches | Time elapsed between an event occurring and an alert being generated |
| False Positive Rate | Helps prevent alert fatigue | Ratio of non-malicious alerts to the total number of alerts triggered |
| Cost per Monitored Workload | Keeps your budget on track | Total resource consumption of security tools divided by the number of pods |
| Event Drop Rate | Ensures no gaps in visibility | Percentage of system calls missed by the security engine |
These metrics are critical for optimizing processes and allocating resources efficiently.
Key Metrics for Runtime Security Monitoring
To implement effective runtime security monitoring, set resource limits for security agents – such as 100m CPU and 512Mi memory per node. This avoids performance slowdowns and unexpected scaling costs. Focus on filtering out low-value events early and route only high-priority alerts through cost-efficient channels.
Regularly reviewing detection rules – ideally every quarter – helps refine operations. Using tiered alerting, where only critical events are routed to paid paging services, can further streamline costs. Conducting a two-week billing audit is another practical step; this often identifies idle or over-provisioned resources, allowing companies to reclaim 30–60% of wasted spending. By keeping a close eye on these metrics, startups can maintain strong security while staying within budget.
How TechVZero Cuts Costs Without Compromising Security
TechVZero offers a practical approach to cost savings through smart infrastructure choices. Their bare metal Kubernetes setup delivers 40–60% savings compared to managed cloud services, while still including built-in security features like DDoS protection. By avoiding the premium costs of managed services, TechVZero provides high reliability without unnecessary extras.
For routine operations, outsourcing daily Runops tasks to TechVZero can lower costs by up to 70% compared to maintaining an in-house team. You’ll still have full control and visibility through KPIs and SLAs, but without the expense of 24/7 staffing.
Cost management doesn’t stop there. Using real-time anomaly detection, billing audits, and cost-aware observability ensures spending stays in check. Policies like tiered storage and log filtering can reduce observability costs by over 70%. Additionally, monitoring unit-level and utilization metrics directly within DevOps workflows helps spot spending spikes early, keeping your budget on track.
Step-by-Step Guide: Implementing Runtime Security at Your Startup
Implementing runtime security at a startup doesn’t have to break the bank or require a massive team. The secret lies in prioritizing risks and addressing your most pressing threats first. As Valydex aptly states:
"Budget security is risk‑prioritized security, not minimal security."
The trick is to follow a structured approach, starting with the basics and gradually layering in more advanced controls. Here’s how to get it done without draining your resources.
Identify Your Current Security Gaps
Start by identifying the risks that could cause the most damage. Focus on mitigating vulnerabilities that are actively exploitable.
The statistics are eye-opening: 99% of cloud security failures through 2026 are projected to be caused by customer misconfigurations and runtime risks. Even more concerning, 62% of organizations knowingly release applications with security vulnerabilities to meet deadlines. The first step is to figure out where your startup might fall into these patterns.
Leverage tools you already have. For example, if you’re using Microsoft 365 Business Premium ($22/user/month), you’ve got access to Defender, Entra ID, and Intune. Similarly, Cloudflare’s free tier provides Zero Trust and DNS filtering for up to 50 users. Making the most of these built-in features can save $300–$600 per month for a 30-person team.
When it comes to runtime-specific risks, remember that scanning images during build time won’t catch everything. Runtime monitoring is essential for spotting issues like shell spawns or unauthorized file access as they occur. Focus your initial assessment on three critical areas:
- Identity integrity: Is multi-factor authentication (MFA) enabled everywhere?
- Endpoint trust: Are all devices compliant with security policies?
- Recovery readiness: Can you restore data from backups if needed?
Here’s a 90-day roadmap to get started:
| Phase | Timeframe | Focus Area | Key Actions |
|---|---|---|---|
| Foundation | Days 1–30 | Identity & Access | Enable MFA, enforce least privilege, verify workflows |
| Resilience | Days 31–60 | Continuity | Automate backups, control vendor access, manage exception lifecycles |
| Validation | Days 61–90 | Optimization | Test incident runbooks, review scorecards, fine-tune detection rules |
Enabling MFA alone can prevent 99% of account takeovers. That’s a high-impact, low-effort win you should prioritize.
Once you’ve pinpointed your gaps, move on to deploying cost-effective monitoring tools to cover those vulnerabilities.
Deploy Monitoring Tools and Set Up Automated Alerts
With your gaps identified, the next step is deploying lightweight monitoring tools that won’t bog down your infrastructure. For Kubernetes environments, Helm with the eBPF driver is a solid choice – it’s secure, works on locked-down operating systems like Talos Linux, and doesn’t rely on kernel modules.
For runtime monitoring, deploy Falco as a DaemonSet to track system calls across your cluster. The eBPF driver is especially useful because it’s compatible with immutable operating systems and doesn’t require a writable filesystem or build tools.
Set up runtime rules to catch common threats like:
- Shell spawns
- Access to sensitive files (e.g.,
/etc/shadow) - Suspicious outbound connections
- Privilege escalation attempts
To manage alerts, use Falcosidekick as a central hub. It can forward alerts to over 50 destinations, including Slack, PagerDuty, Elasticsearch, and Prometheus. Configure tiered alerting so that only critical events trigger paid paging services, while lower-priority alerts go through free options like email or Slack.
Before rolling out new rules, validate them in a staging environment using falcoctl to test syntax against sample events. False positives can disrupt legitimate operations, so thorough testing is critical.
For efficiency, prioritize rule conditions by cost. Start with simple checks (e.g., evt.type) before moving to more complex substring searches. Use the exceptions structure to whitelist known-good behaviors, like CI/CD runners, instead of altering base rules.
Monitor Falco’s performance by exporting metrics to Prometheus. Keep an eye on falco_kernel_drops_total – a high count means the tool might be overloaded and missing events.
Additionally, integrate Gitleaks into your CI/CD pipeline to catch hardcoded secrets before they reach production.
Once your monitoring is up and running, focus on regular validation to maintain your security posture.
Schedule Regular Security Audits
Runtime security isn’t a “set it and forget it” task. Regular validation is essential. Update your detection rules at least quarterly to stay ahead of new threats. Document all rule exceptions with clear justifications to maintain a clean audit trail, especially for compliance with standards like SOC2 or HIPAA.
Use monthly scorecards to track control reliability. Key metrics to monitor include MFA adoption rates, endpoint compliance, and incident response times. Automate evidence collection throughout the quarter to avoid last-minute scrambles before audits.
Don’t skip quarterly restore tests for your backups – they’re non-negotiable. Cyber insurance providers are increasingly requiring evidence of MFA, endpoint detection and response (EDR), and tested recovery procedures by 2026. Implementing these controls can even lower your premiums.
If you’re dealing with contractual or regulatory requirements, like SOC2 or HIPAA, plan your budget accordingly. Assurance-focused controls might cost $2,000+ per month, while a basic setup for early-stage startups typically ranges from $100 to $500 per month.
Establish a governance structure that includes executive sponsors for quarterly reviews and program owners for monthly reporting. This ensures security stays visible without becoming a burden.
When done right, runtime security platforms can save 95% of the time typically spent on vulnerability management and reduce noise from irrelevant vulnerabilities by 98%. The key is consistent tuning and validation – not just deploying tools and walking away.
Conclusion
You don’t have to break the bank or slow down your processes to achieve effective runtime security. By focusing on event-driven detection instead of resource-heavy scans, you can significantly reduce compute and I/O overhead. Open-source tools also offer powerful capabilities that rival enterprise-grade solutions – without the hefty price tag.
Integrating security directly into your CI/CD pipelines and adopting a "Minimum Viable Security" mindset can help you establish a strong security baseline. This means prioritizing essentials like multi-factor authentication, encrypted backups, and runtime monitoring. Meanwhile, leveraging eBPF-based instrumentation improves performance and stability on modern kernels, all while keeping system overhead low.
The numbers speak for themselves: 74% of data breaches involve human errors, such as misconfigurations and default credentials, and 69% of cloud breaches are tied to misconfigurations. These aren’t issues that expensive enterprise solutions alone can fix. Instead, they demand smarter tools, well-implemented automation, and consistent validation.
Using lightweight monitoring tools combined with cost-effective infrastructure doesn’t just save money – it builds trust, supports enterprise sales, and can reduce reactive spending by 2–4 times when compared to proactive investment. As Dmitry Marinov aptly says:
"Cybersecurity can’t be an afterthought or a checklist item. It must be woven into the fabric of how technology teams build, deploy, and operate software, without sacrificing speed or innovation."
FAQs
How do I choose between Falco and Sysdig OSS?
To decide between Falco and Sysdig OSS, think about what your priorities are.
- Falco is ideal for lightweight, rule-based threat detection. It focuses on system calls and audit logs, making it a great fit for containers and Kubernetes environments where customizable detection is key.
- On the other hand, Sysdig OSS provides a broader range of features, including monitoring, visualization, and metrics. However, it offers less flexibility when it comes to custom rules.
If your main concern is tailored detection capabilities, Falco is the way to go. But if you need an all-in-one monitoring solution with added security features, Sysdig OSS might be the better choice.
What should I alert on first to avoid noise?
Prioritize alerts that address the most pressing risks, such as active exploits or high-severity vulnerabilities, identified through runtime context. Using tools designed to highlight exploitable threats can significantly cut down on unnecessary noise. To stay focused, assign severity scores by considering factors like the potential impact of a threat and the likelihood of it being exploited. This method ensures attention is directed toward high-risk alerts, reducing the clutter of low-priority notifications and avoiding alert fatigue.
When should a startup upgrade to paid runtime security?
When a startup’s needs outgrow what free runtime security tools can handle, it’s time to think about upgrading to a paid solution. This often happens when they require advanced threat detection, continuous rule updates, and comprehensive monitoring to manage the increasing complexity of cloud-native environments. Paid tools become even more crucial as startups scale, offering stronger and more dependable protection to keep up with their growth.