Kubernetes Pod Strategies for Spot‑First Deployments
Want to cut cloud costs by 70-90%? Spot instances are your answer. These are discounted, spare compute resources offered by providers like AWS, Google Cloud, and Azure. But they come with a catch: interruptions. Kubernetes helps you manage these interruptions while keeping your applications running smoothly.
Here’s how Kubernetes makes spot-first deployments work:
- Spot Node Groups: Configure nodes for spot instances with diverse instance types and availability zones to minimize disruptions.
- Taints and Tolerations: Use taints to control which workloads run on spot nodes. Tolerations allow interruption-tolerant pods to use these nodes.
- Pod Disruption Budgets (PDBs): Ensure service reliability by limiting how many pods can be disrupted during node drains.
- Node Termination Handlers: Automate responses to interruption notices, ensuring pods shut down gracefully within the warning period.
- Autoscaling: Combine Horizontal Pod Autoscaler (HPA) and Cluster Autoscaler (CA) to scale workloads efficiently, prioritizing spot nodes.
- Diversification: Spread workloads across multiple instance types and zones to reduce risks from capacity shortages.
Cut Kubernetes Costs with AWS Graviton & Spot | Karpenter & KEDA Tutorial
sbb-itb-f9e5962
Setting Up Spot Node Groups and Taints
Spot-first deployments focus on cost efficiency and handling interruptions. To make this work, you’ll need to set up node groups specifically for spot instances and configure taints to control workload placement.
Creating Spot Node Groups
The key to reducing interruptions is diversifying your spot node groups across instance types and availability zones. This strategy helps minimize the impact when AWS reclaims spot instances. EKS managed node groups simplify this process by automatically implementing best practices, like draining nodes before termination.
Here’s an example eksctl configuration for a diversified spot node group:
managedNodeGroups: - name: spot-nodes instanceTypes: ["m5.large", "m5a.large", "m5d.large", "m5n.large"] spot: true availabilityZones: ["us-west-2a", "us-west-2b", "us-west-2c"] taints: - key: spotInstance value: "true" effect: PreferNoSchedule labels: intent: apps lifecycle: Ec2Spot This setup spans four m5 instance types across three availability zones. By default, EKS uses the capacity-optimized-prioritized allocation strategy, which selects instances from pools with the most capacity, helping reduce termination rates.
For teams using Karpenter, the configuration looks different but achieves the same outcome. Karpenter’s "Price Capacity Optimized" strategy picks spot pools with the best mix of availability and price:
apiVersion: karpenter.sh/v1 kind: NodePool metadata: name: spot-diversified spec: template: spec: nodeClassRef: group: karpenter.k8s.aws kind: EC2NodeClass name: default taints: - key: spot-only value: "true" effect: NoSchedule requirements: - key: "karpenter.sh/capacity-type" operator: In values: ["spot"] - key: "karpenter.k8s.aws/instance-category" operator: In values: ["c", "m", "r"] - key: "topology.kubernetes.io/zone" operator: In values: ["us-west-2a", "us-west-2b"] - key: "kubernetes.io/arch" operator: In values: ["amd64"] Karpenter dynamically selects from compute-optimized (c), general-purpose (m), and memory-optimized (r) instances. If it encounters an "insufficient capacity" error in a spot pool, it caches the error for three minutes before exploring other pools or switching to on-demand instances.
Once your node groups are ready, you’ll need to configure taints to ensure only the right pods are scheduled on these nodes.
Applying Spot Taints
After setting up your spot node groups, taints help ensure workloads are appropriately directed. Taints act as filters, restricting which pods can run on spot nodes. The effect you choose determines how strictly this rule is applied.
NoSchedulefor strict separation: This ensures only pods with matching tolerations can be scheduled on spot nodes. It’s ideal for protecting critical, stateful, or long-running applications from interruptions.PreferNoSchedulefor flexibility: This allows pods to avoid spot nodes unless the cluster is under resource pressure. It’s a good option for using spot nodes as overflow capacity.
In EKS managed node groups, you can define taints directly in your eksctl configuration or via the AWS CLI. For Karpenter, taints are specified in the NodePool resource. If a pod lacks a matching toleration, Karpenter won’t use that pool to provision it.
EKS managed node groups support up to 50 taints per group. To keep things organized, pair your taints with clear labels like lifecycle: Ec2Spot or intent: apps. These labels make it easier to target nodes with pod affinity rules down the line.
Configuring Pod Tolerations and Node Affinity
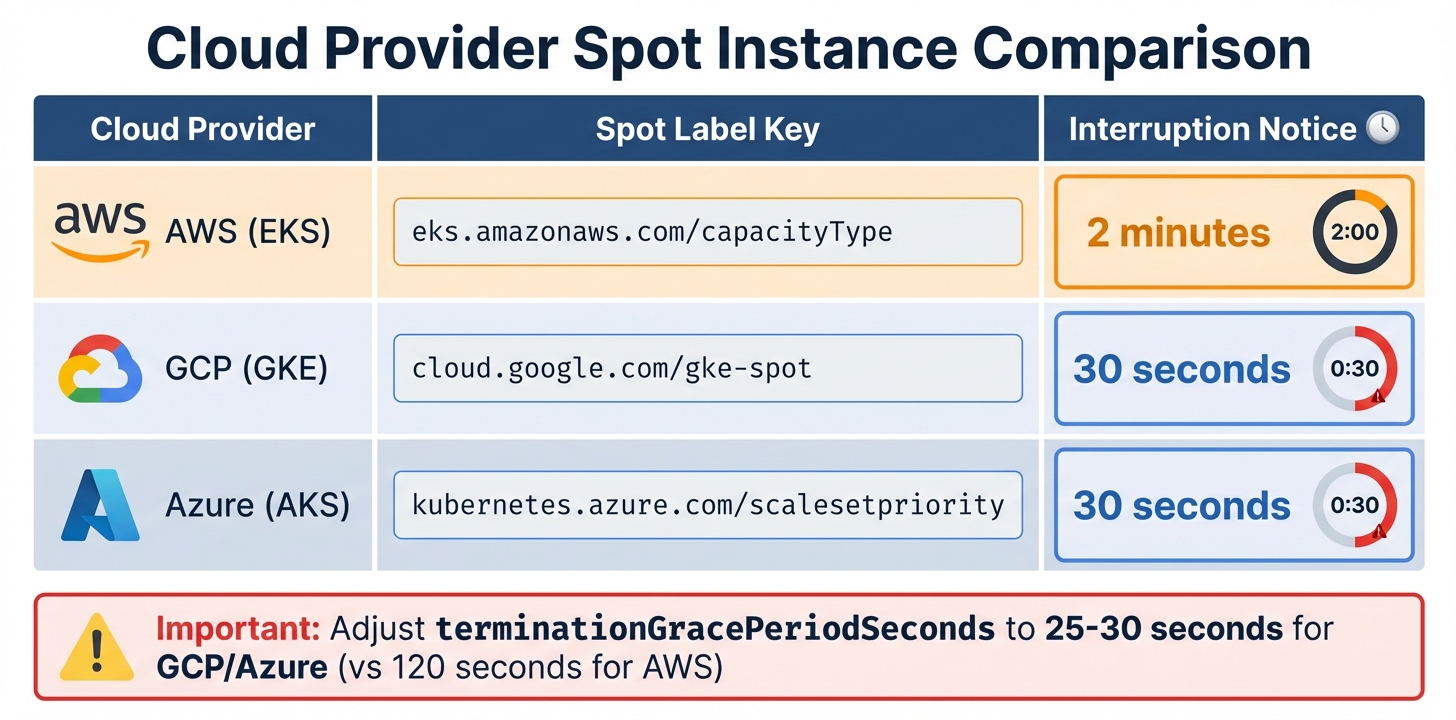
Cloud Provider Spot Instance Comparison: Labels and Interruption Notices
Once you’ve tainted your spot nodes, the next step is deciding which pods can use them. This involves setting up pod tolerations and node affinity rules.
The idea is to divide workloads into two groups. Baseline workloads include critical services like databases, single-replica applications, and control plane components. These need stability and should stick to on-demand nodes. On the other hand, opportunistic workloads, such as stateless web frontends, batch jobs, CI/CD runners, or checkpointable machine learning tasks, can handle interruptions and are a great match for spot instances.
By keeping a core number of replicas on on-demand nodes and using spot instances for extra capacity, you can save 60–90% on costs while maintaining service reliability. Here’s how to configure deployments and jobs to make this work.
Adding Tolerations for Fault-Tolerant Pods
Tolerations allow pods to run on tainted spot nodes. Without them, the scheduler skips over these nodes. The toleration must match the taint’s key, value, and effect exactly.
Below is an example deployment for a stateless API service that can handle spot interruptions:
apiVersion: apps/v1 kind: Deployment metadata: name: api-service spec: replicas: 5 template: spec: tolerations: - key: "spotInstance" operator: "Equal" value: "true" effect: "PreferNoSchedule" terminationGracePeriodSeconds: 120 containers: - name: api image: myapp:latest lifecycle: preStop: exec: command: ["/bin/sh", "-c", "sleep 15 && kill -SIGTERM 1"] In this setup, terminationGracePeriodSeconds ensures the pod has enough time to shut down gracefully during AWS’s 2-minute interruption notice. The preStop hook adds a delay, letting load balancers deregister the pod before it stops handling traffic.
For non-critical workloads, a simpler job configuration might look like this:
apiVersion: batch/v1 kind: Job metadata: name: data-processing spec: template: spec: tolerations: - key: "spot-only" operator: "Equal" value: "true" effect: "NoSchedule" restartPolicy: OnFailure containers: - name: processor image: data-processor:v2 This job runs exclusively on nodes tainted with spot-only=true:NoSchedule. If a spot instance is interrupted mid-job, Kubernetes will attempt to restart it on another available spot node.
Setting Node Affinity Rules for Spot Preference
While tolerations let pods run on spot nodes, node affinity helps guide the scheduler to prefer them. Using preferredDuringSchedulingIgnoredDuringExecution, you can prioritize spot nodes but still allow fallback to on-demand nodes. Here’s an example configuration:
apiVersion: apps/v1 kind: Deployment metadata: name: web-frontend spec: replicas: 10 template: spec: tolerations: - key: "spotInstance" operator: "Equal" value: "true" effect: "PreferNoSchedule" affinity: nodeAffinity: preferredDuringSchedulingIgnoredDuringExecution: - weight: 100 preference: matchExpressions: - key: eks.amazonaws.com/capacityType operator: In values: - SPOT - weight: 1 preference: matchExpressions: - key: eks.amazonaws.com/capacityType operator: In values: - ON_DEMAND In this example, the scheduler strongly favors spot instances (weight 100) but can fall back to on-demand nodes (weight 1) when spot capacity is unavailable.
For critical baseline workloads, enforce strict on-demand placement using requiredDuringSchedulingIgnoredDuringExecution:
apiVersion: apps/v1 kind: Deployment metadata: name: database-primary spec: replicas: 1 template: spec: affinity: nodeAffinity: requiredDuringSchedulingIgnoredDuringExecution: nodeSelectorTerms: - matchExpressions: - key: eks.amazonaws.com/capacityType operator: In values: - ON_DEMAND This ensures that critical services, like databases, never end up on spot nodes, regardless of availability.
Each cloud provider uses its own label for identifying spot nodes. Below is a quick reference:
| Cloud Provider | Spot Label Key | Interruption Notice |
|---|---|---|
| AWS (EKS) | eks.amazonaws.com/capacityType |
2 minutes |
| GCP (GKE) | cloud.google.com/gke-spot |
30 seconds |
| Azure (AKS) | kubernetes.azure.com/scalesetpriority |
30 seconds |
For GCP and Azure, adjust terminationGracePeriodSeconds to 25–30 seconds instead of the 120 seconds recommended for AWS. This ensures pods can handle their shorter interruption notice windows effectively.
Managing Spot Instance Interruptions
Spot instances are a cost-effective choice, but they come with a catch: they can be reclaimed by cloud providers at any time. AWS offers a 2-minute warning, while GCP and Azure provide just 30 seconds. This makes automating responses essential to maintain the benefits of a spot-first deployment.
Without automation, interruptions can lead to dropped connections and failed requests. A node termination handler steps in to manage this. It detects interruption notices, cordons the affected node, and drains pods within the available time frame. Leveraging the Eviction API ensures pods are terminated gracefully while adhering to Pod Disruption Budgets (PDBs). Let’s dive into how to set this up.
"AWS Node Termination Handler ensures that the Kubernetes control plane responds appropriately to events that can cause your EC2 instance to become unavailable." – AWS
Installing Node Termination Handlers
The AWS Node Termination Handler (NTH) is a go-to tool for handling spot interruptions on AWS. It offers two modes of operation:
- IMDS mode: A DaemonSet that polls the Instance Metadata Service on each node for AWS’s 2-minute interruption warning.
- Queue Processor mode: A Deployment that monitors an SQS queue for cluster-wide events like Auto Scaling Group lifecycle hooks or rebalance recommendations via EventBridge.
For most deployments, IMDS mode is simpler and doesn’t require additional AWS infrastructure. You can install it using Helm with spot interruption draining enabled:
helm repo add eks https://aws.github.io/eks-charts helm install aws-node-termination-handler eks/aws-node-termination-handler --namespace kube-system --set enableSpotInterruptionDraining=true --set terminationGracePeriodSeconds=120 This setup gives pods the full 2-minute window to wrap up in-flight requests and deregister from load balancers. On GCP or Azure, where the warning period is only 30 seconds, adjust terminationGracePeriodSeconds to 25 seconds to ensure cleanup finishes before the VM shuts down. Once the termination handler is active, PDBs provide an additional layer of protection during node drains.
Setting Up Pod Disruption Budgets
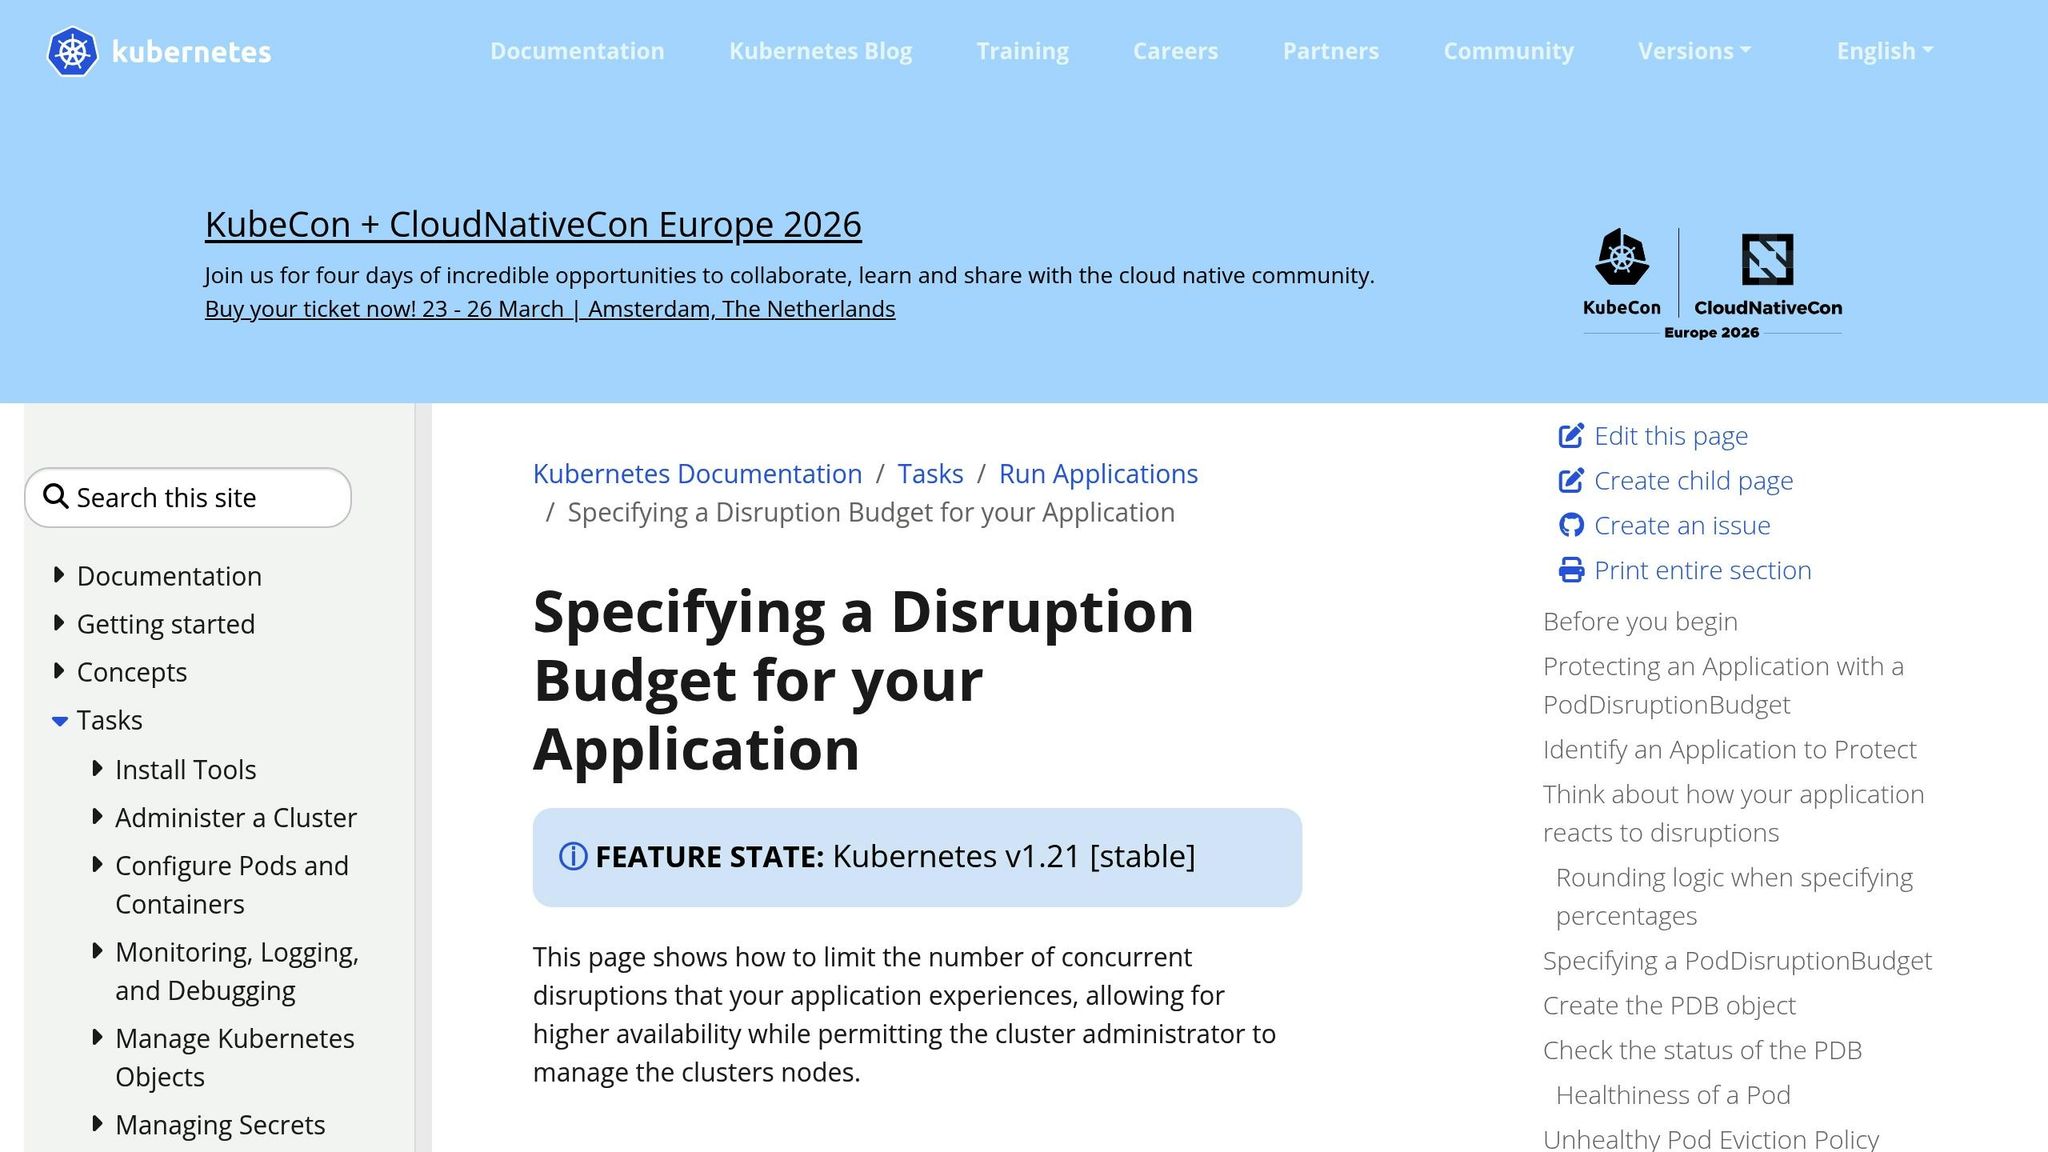
Pod Disruption Budgets (PDBs) ensure service stability during voluntary disruptions, like draining spot instances. When a node drain is initiated, the Eviction API checks the PDB. If evicting a pod would violate the budget, the eviction is paused until a replacement pod is ready.
Here’s an example PDB for a stateless web service that allows one pod to be unavailable at a time:
apiVersion: policy/v1 kind: PodDisruptionBudget metadata: name: web-frontend-pdb spec: maxUnavailable: 1 selector: matchLabels: app: web-frontend unhealthyPodEvictionPolicy: AlwaysAllow The maxUnavailable: 1 setting ensures that only one pod is disrupted at any given time, preserving application stability. The unhealthyPodEvictionPolicy: AlwaysAllow allows pods already in failing states (like CrashLoopBackOff) to be evicted, ensuring they don’t block the drain process.
Avoid setting minAvailable to 100% or equal to the number of replicas. Doing so can create a deadlock, where no pods can be evicted, effectively halting the node drain. For example, if you have three replicas and set minAvailable: 3, the drain process will hang indefinitely.
"If you set maxUnavailable to 0% or 0, or you set minAvailable to 100% or the number of replicas, you are requiring zero voluntary evictions. When you set zero voluntary evictions… then you cannot successfully drain a Node." – Kubernetes Documentation
Configuring Autoscaling for Spot‑First Deployments
To build on strategies for managing spot interruptions, autoscaling ensures efficient capacity management while keeping costs low. In a spot-first setup, autoscaling depends on the Horizontal Pod Autoscaler (HPA) and the Cluster Autoscaler (CA) working together. HPA adjusts the number of pods based on demand, while CA adds nodes to the cluster when pods are unscheduled due to insufficient capacity.
When using CA, prioritizing spot node groups is key to maintaining cost efficiency. The Priority Expander is a tool that makes this possible by assigning numerical weights to node groups via a ConfigMap. Higher weights indicate higher priority. For instance, you could set a priority of 50 for spot groups and 10 for on-demand groups. This setup ensures CA scales spot capacity first and only resorts to on-demand nodes if spot capacity is unavailable.
"The priority expander lets you influence which node pool the cluster autoscaler scales first… to optimize for cost, but fall back to regular VMs if no spot capacity is available." – AKS Engineering Blog
This method can lead to significant savings, as spot instances can reduce costs by 60% to 90%. As traffic grows, HPA scales up pod replicas, and CA provisions additional spot nodes to accommodate any pending pods.
Scaling with Cluster Autoscaler
To configure CA for spot-first scaling, create a ConfigMap named cluster-autoscaler-priority-expander in the kube-system namespace. This ConfigMap defines how node groups are prioritized:
apiVersion: v1 kind: ConfigMap metadata: name: cluster-autoscaler-priority-expander namespace: kube-system data: priorities: |- 50: - .*spot.* 10: - .*on-demand.* 1: - .*catch-all.* In this example:
- Node groups with "spot" in their name get a priority of 50.
- Groups labeled "on-demand" receive a priority of 10.
- Any other groups fall into a catch-all category with priority 1.
If the spot group (priority 50) can handle the pending pods, CA scales it up. If not, it falls back to the on-demand group (priority 10).
Key Tip: Keep spot and on-demand capacities in separate node groups. This allows you to apply specific taints, labels, and scaling policies. For example, you can taint spot nodes with spot=true:NoSchedule to prevent critical workloads from being placed on them, while leaving on-demand nodes untainted for essential tasks.
This priority setup works seamlessly with HPA, which adjusts pod replicas based on resource demand.
Using Horizontal Pod Autoscaler for Spot Workloads
HPA dynamically adjusts the number of pod replicas based on metrics like CPU and memory usage. For HPA to work, resource requests must be defined for your pods. Additionally, ensure the Metrics Server is installed in your cluster to provide the necessary data.
Here’s an example HPA configuration for a stateless web service:
apiVersion: autoscaling/v2 kind: HorizontalPodAutoscaler metadata: name: web-frontend-hpa spec: scaleTargetRef: apiVersion: apps/v1 kind: Deployment name: web-frontend minReplicas: 3 maxReplicas: 20 metrics: - type: Resource resource: name: cpu target: type: Utilization averageUtilization: 70 This configuration ensures that:
- The service maintains an average CPU usage of 70%.
- HPA scales up pods when CPU utilization exceeds 70%.
- HPA scales down pods when utilization decreases, with a 5-minute stabilization window to avoid constant adjustments.
While HPA determines the required number of pods, CA ensures enough node capacity exists. For deployments on spot nodes, HPA scales up pods with node affinity and tolerations targeting the spot pool. If additional capacity is needed, CA provisions spot nodes first using the Priority Expander.
Important: Always reserve a fixed number of on-demand replicas for critical workloads. For example, you might keep three replicas on on-demand nodes while letting HPA scale additional pods onto spot nodes. This approach balances cost savings with availability.
Diversifying Spot Pools for Better Reliability
When building spot-first deployments, relying on just one instance type or availability zone can be risky. Spot capacity is divided into pools, which are combinations of instance types and availability zones. Each pool operates independently, with its own supply and demand conditions. For example, if the availability of c5.xlarge in us-east-1a tightens, it won’t necessarily affect other pools, like m5.xlarge in the same zone.
The total number of spot capacity pools is determined by multiplying the number of availability zones by the number of instance types. For instance, using six availability zones and four instance types creates 24 distinct pools. This diversification minimizes the risk of a single market fluctuation disrupting your entire cluster. Chris Foote, Sr. EC2 Spot Specialist Solutions Architect at AWS, highlights this approach as a cornerstone for reliable spot deployments. This model not only reduces risk but also scales effectively to meet demand.
Diversification offers more than just reliability. By leveraging multiple instance types, you increase the overall capacity available to your clusters. This setup allows scaling up to 500,000 concurrent cores while reducing the time needed to provision new nodes. This speed is critical when autoscalers must respond quickly to sudden traffic increases without being hampered by capacity constraints in a single pool.
Diversifying Instance Types
To maintain high availability, use at least six different instance types. The key is to choose types with similar vCPU-to-memory ratios – commonly 1:4 for general-purpose workloads – so the Cluster Autoscaler can consistently schedule pods across all nodes in the group.
Here’s an example of a diversified node group configuration for AWS EKS:
apiVersion: eksctl.io/v1alpha5 kind: ClusterConfig metadata: name: production-cluster region: us-east-1 managedNodeGroups: - name: spot-diversified instanceTypes: - m5.xlarge - m5d.xlarge - m5n.xlarge - m5a.xlarge - m4.xlarge - c5.xlarge - c5d.xlarge - c5n.xlarge spot: true capacityType: SPOT spotAllocationStrategy: capacity-optimized minSize: 3 maxSize: 50 desiredCapacity: 6 labels: lifecycle: spot workload-type: stateless taints: - key: spot value: "true" effect: NoSchedule This configuration combines multiple instance families. Using the capacity-optimized allocation strategy ensures that instances are launched into pools with the most available capacity, reducing the likelihood of interruptions.
Tip: Avoid mixing instance types with different resource ratios in the same node group. For instance, if you need both memory-optimized (1:8 ratio) and compute-optimized (1:2 ratio) instances, create separate node groups for each. This approach prevents the autoscaler from mismanaging resources due to mismatched profiles.
Once you’ve diversified by instance type, ensure the nodes are evenly distributed across availability zones for better reliability.
Spreading Across Multiple Availability Zones
Distributing spot nodes across multiple availability zones helps prevent localized capacity issues from affecting your entire service. Kubernetes topologySpreadConstraints can enforce even distribution of pod replicas across zones.
Here’s an example deployment configuration for spreading pods across zones:
apiVersion: apps/v1 kind: Deployment metadata: name: web-frontend spec: replicas: 9 selector: matchLabels: app: web-frontend template: metadata: labels: app: web-frontend spec: topologySpreadConstraints: - maxSkew: 1 topologyKey: topology.kubernetes.io/zone whenUnsatisfiable: DoNotSchedule labelSelector: matchLabels: app: web-frontend tolerations: - key: spot operator: Equal value: "true" effect: NoSchedule affinity: nodeAffinity: preferredDuringSchedulingIgnoredDuringExecution: - weight: 100 preference: matchExpressions: - key: lifecycle operator: In values: - spot containers: - name: web-frontend image: nginx:1.24 resources: requests: cpu: 500m memory: 1Gi limits: cpu: 1000m memory: 2Gi The maxSkew: 1 setting ensures that the difference in pod count between any two zones never exceeds one replica. For example, with nine replicas across three zones, each zone will host three pods. If one zone experiences spot interruptions, the remaining two zones can still manage six replicas – enough to handle traffic while the autoscaler provisions new capacity.
The DoNotSchedule policy ensures that pods remain pending if the constraints can’t be met, avoiding overloading a single zone.
For critical applications, consider a hybrid strategy. Deploy a fixed number of replicas (e.g., three) on on-demand nodes without zone constraints, and let additional spot replicas spread across zones. This approach combines the cost savings of spot instances (70-90% savings) with the reliability of guaranteed baseline capacity that can weather spot market fluctuations.
Conclusion
Spot-first deployments aren’t about compromising between saving money and maintaining reliability – they’re about designing systems that achieve both. By spreading workloads across multiple instance types and availability zones, you can tap into 24 distinct capacity pools. This approach helps insulate your workloads from localized market disruptions. Tools like Karpenter or the AWS Node Termination Handler use the two-minute warning before instance termination to ensure a smooth transition, preventing service outages.
Key configuration strategies – like using taints and tolerations for workload placement, setting up Pod Disruption Budgets, applying topology spread constraints for even zone distribution, and leveraging capacity-optimized allocation – act as safeguards. These allow you to scale aggressively while keeping downtime at bay. For SaaS and AI companies dealing with unpredictable web traffic or ML training with checkpointing, these methods can cut costs by as much as 60% to 90% as you grow.
"Every dollar you don’t burn on compute is a dollar you can reinvest in engineering, features, and uptime." – Ido Slonimsky, Tech Lead, Zesty
The trick is to embrace spot instances for what they are: a volatile compute layer. Keep mission-critical databases and control planes on stable on-demand nodes, ensure applications can handle SIGTERM signals during the terminationGracePeriodSeconds window, and let stateless workloads take advantage of spot capacity. This tiered approach guarantees a steady foundation for essential services while enabling flexible, cost-effective scaling for everything else.
While spot instances aren’t a one-size-fits-all solution, configuring them properly in Kubernetes turns them into a powerful tool. They allow you to scale your infrastructure without letting your cloud costs spiral out of control.
FAQs
How do I decide which pods should run on spot nodes?
When deciding which pods to deploy on spot nodes, prioritize stateless and fault-tolerant workloads. These include tasks like batch processing or machine learning jobs that can withstand interruptions without significant issues. On the other hand, avoid running critical or stateful workloads, such as databases, on spot nodes, as they require consistent uptime and stability.
To maintain availability, implement strategies like Pod Disruption Budgets to control the number of disruptions allowed and node affinity to influence pod placement. Additionally, keep a close eye on interruption signals so you can proactively reschedule or migrate pods to other nodes when necessary. These approaches help ensure that your workloads remain manageable and efficient, even in dynamic environments.
What should I set for terminationGracePeriodSeconds on spot?
When configuring your workload for spot instances, it’s important to set the terminationGracePeriodSeconds parameter to allow sufficient time for a graceful shutdown during an interruption. A good range to consider is 25–60 seconds, which aligns with most provider notice windows. For AWS, where the interruption notice is typically 2 minutes, setting it to 30–60 seconds strikes a balance between ensuring proper termination and maintaining efficiency.
How do I prevent spot interruptions from causing downtime?
To keep downtime to a minimum during spot interruptions in Kubernetes, there are several strategies you can use. Start with Pod Disruption Budgets (PDBs), which help control the number of disruptions your pods can tolerate. This ensures critical workloads remain available. Additionally, make use of spot instance signals to gracefully cordon nodes, allowing pods to finish their tasks before the node is terminated. Pair this with node termination handlers to quickly reschedule affected pods, reducing potential delays.
It’s also smart to design your workloads to be stateless or fault-tolerant, so they can recover easily if interrupted. Lastly, diversify your deployments by using a mix of instance types and zones. This reduces the risk of simultaneous interruptions affecting your entire system. These approaches work together to build resilience and maintain service availability, even during spot interruptions.